
Your web history can easily be tracked.
The internet is connected through Internet Protocol addresses. Each device on the internet communicates through these unique addresses to work. In order for us to know which device to talk to we use the Domain Name System (DNS) to look up things like we would have looked up phone numbers with an old phone book. So when you type facebook.com in your browser address, your device doesn’t initially know where Facebook is on the internet. So it has to reach out to a DNS server first. Then it will connect you to Facebook’s website once it has it’s IP Address.
We can perform the process ourselves to look up Facebook’s IP address with the following command in the terminal.
nslookup facebook.com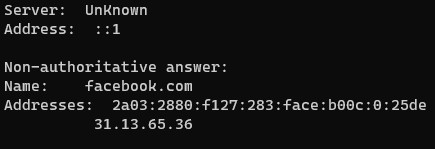
Every time you look up new websites, your device is constantly contacting a DNS server to get addresses for the websites you type into your browser. If there is a wire-tap between your device and the DNS server you are querying for website IP addresses, the communication is coming over the wire in clear text.
Running network analysis, it is easy to decipher the communications and the websites you are visiting.

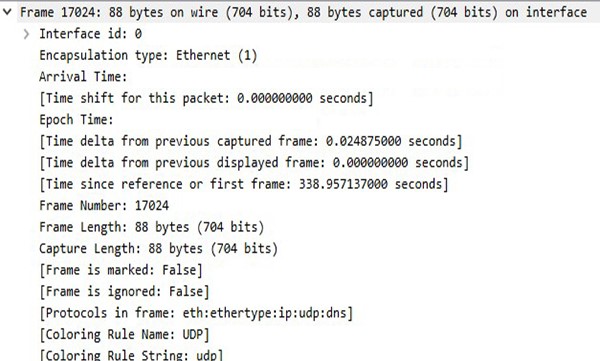
And with the proper tools like Wireshark, you can also examine and log the whole DNS query packet. The source port, the source IP address, and the website you were visiting are details that can be logged. If additional traffic starts going to the returned IP address for the domain requested to the DNS server, it could indicate that you are visiting that site. Possibly in real time depending on the attack.
You could also fall prey to DNS hijacking. This is where an attacker could intercept the transmission between you and the DNS server thus having to ability to serve you false IP addresses that may lead your browser to a malicious website.
So what is the solution to type of attack?
To mitigate this attack, we use encryption to traffic our DNS requests to and from our DNS servers. Right now there are multiple protocols that implement this :
DNSCrypt
- Provides encryption and server Authentication
- Some data can be collected, i.e. that you are using DNS
- Semi-supported
- Mitigates DNS Spoofing attacks
- Does not meet Open Standards
DNS over TLS
- Widely-supported
- Provides full stream encryption
- Uses Open Standards
DNS over HTTPS
- Masquerades web queries as DNS queries
- Provides full stream encryption
- Does not use Open Standards
In essence, these protocols work the same way. They provide an extra level of security by encrypting your DNS queries while communicating with your DNS server. In doing so, it prevents the opportunity for an attacker to log or manipulate your DNS communications.
If implementing this type of security interests you, continue to learn how to install and configure on Windows, Mac and Arch Linux.
Windows Installation
We’ll use Chocolately so we can install software from the most current repositories.
You can learn more in my post about installing and using Chocolately here.
Go to Window’s Start, search Powershell, right click on the icon, hover “More” and click “Run As Administrator”. Then run the following command.
Set-ExecutionPolicy Bypass -Scope Process -Force; [System.Net.ServicePointManager]::SecurityProtocol = [System.Net.ServicePointManager]::SecurityProtocol -bor 3072; iex ((New-Object System.Net.WebClient).DownloadString('https://chocolatey.org/install.ps1'))To protect Windows with the DNSCrypt protocol, Simple DNS Crypt is a decent option.
Install with the following command using the choco command.
choco install simplednscrypt -yNext, open Control Panel -> Network and Internet -> Network Connections
Right click on the connection icon you will be using to connect to the internet and click “Properties”. This should be your WIFI or Ethernet network adapter.
Click on Internet Protocol Version 4 (TCP/IPv4) list item and then click “Properties”.
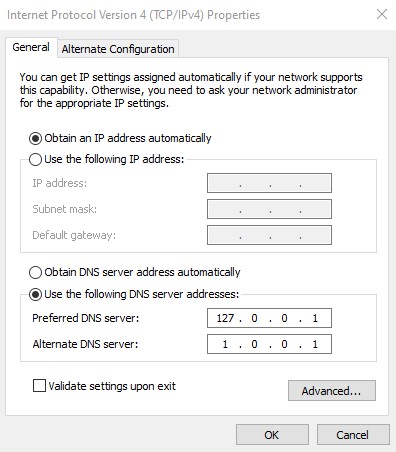
Change the Preferred DNS server to the loopback address, 127.0.0.1. This allows our own computer to intercept DNS queries and send them through Simple DNS Crypt instead of the traditional route of unencrypted DNS. We also use Cloudflare’s privacy-orientated DNS server as a backup with our Alternate DNS server. Then click “OK”.
Go to Window’s Start and open up Simple DNS Crypt.
Your “Main Menu” configuration should look like this.
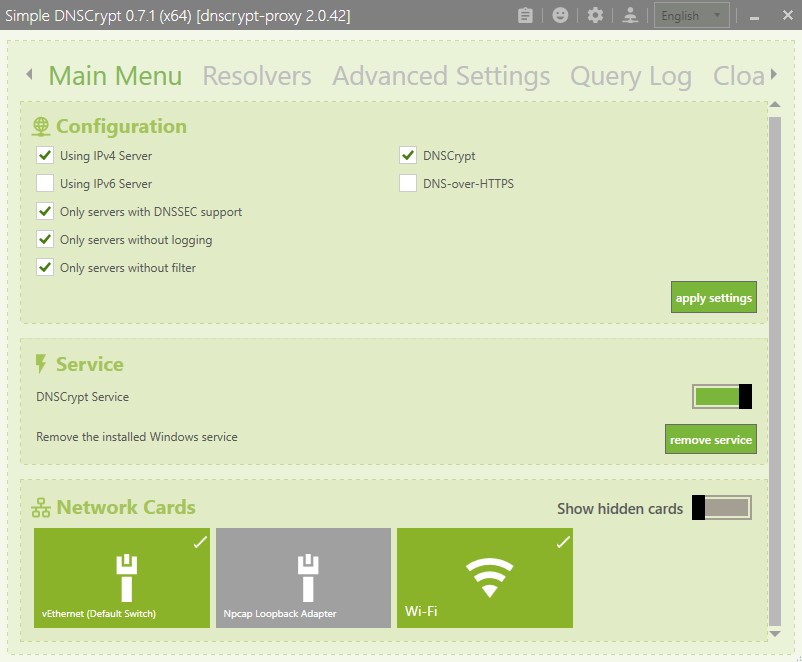
Make sure you are only using IPv4 Server and click “apply settings”. Have the DNSCrypt Service toggled on. Also click on the Network Cards that you will be using to connect to the internet.
Go into “Advanced Settings” on the top menu bar and block IPv6.

Now click on “Query Log” on the top menu bar.
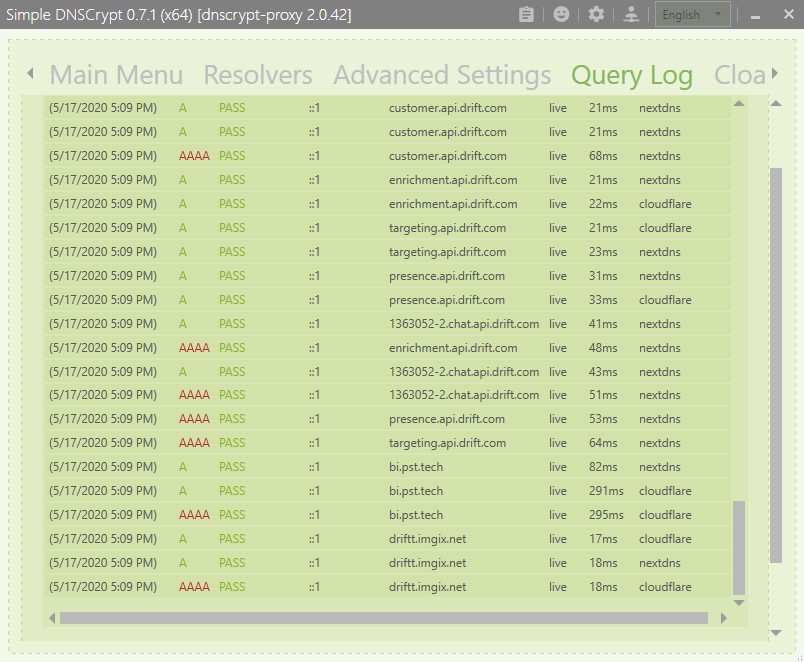
If you are getting queries populating in your “Query Log” feed, you are now using the DNSCrypt protocol to protect your DNS queries on Windows.
Mac Installation
If you are an Apple user, here is how you install on a Mac device.
We will use Cloudflared and DNSMasq.
First install Homebrew in the terminal. Homebrew is Mac’s de facto package manager.
sudo /bin/bash -c "$(curl -fsSL https://raw.githubusercontent.com/Homebrew/install/master/install.sh)"Now install Cloudflared and DNSMasq with Homebrew
brew install cloudflare/cloudflare/cloudflared dnsmasqEdit the DNSMasq configuration file
vim /usr/local/etc/dnsmasq.conf
# uncomment server=/localnet/192.168.0.1
# change to
server=127.0.0.1#54
Now create a config.yml file in the /usr/local/etc/cloudflared directory.
sudo vim /usr/local/etc/cloudflared/config.ymlIn this file, copy and paste the following and save.
proxy-dns: true
proxy-dns-upstream:
- https://1.1.1.1/dns-query
- https://1.0.0.1/dns-query
Lastly, we want to update the system to route all DNS queries through Cloudflared.
sudo networksetup listallnetworkservices
sudo networksetup -setdnsservers <NameOfInterface> 127.0.0.1
Lastly, we want this DNS encryption service to start at boot.
sudo brew services start dnsmasq
sudo cloudflared service install
You can now test at BrowserLeaks to confirm if your queries are going through the secure Cloudflare DNS servers.
Arch Linux Installation
Installation is fairly streamlined on Arch Linux as well. If you are interested in a robust Linux distribution, learn how to install Arch Linux here.
This process should work mostly the same on other Linux distributions that use Systemd.
First we need to install the Dnscrypt-Proxy package.
pacman -S dnscrypt-proxyNext we want to change our DNS servers to point to DNSCrypt-Proxy to intercept our DNS queries.
sudo vim /etc/resolv.confWe want to modify the resolv.conf file to this.
nameserver ::1
nameserver 127.0.0.1
options edns0 single-request-reopen
Next we want to configure DNSCrypt’s toml file.
sudo vim /etc/dnscrypt-proxy/dnscrypt-proxy.tomlModify the server_names variable to your preferred servers. In this case we will use Cloudflare secure DNS servers.
server_names = ['cloudflare', 'cloudflare-ipv6']Confirm there is no other services running on the DNS port, number 53. If the ss command alerts any services are using that port you will have to track down and disable.
ss -lp 'sport = :domain'Finally, we want to enable and start the DNSCrypt service with Systemd.
sudo systemctl enable dnscrypt-proxy.service
sudo systemctl start dnscrypt-proxy.service
You can also use BrowserLeaks to test if your queries are going through the Cloudflare DNS servers and if you resolve the link in your browser, everything is working correctly.
Implementing in the Browser
You can also implement DNS over HTTPS in your favorite Browser.
- To enable, use the following address links to enable.
- Just copy and paste into the browser’s address box and hit “enter”
- Then enable by hitting the “enable” button.
Brave Browser
brave://flags/#dns-over-httpsChrome Browser
chrome://flags/#dns-over-httpsEdge Browser
edge://flags/#dns-over-httpsOpera Browser
opera://flags/opera-dohVivaldi Browser
vivaldi://flags/#dns-over-httpsFirefox
- Click on menu button, select “Options”
- Type “dns” and click “Settings” under “Network Settings”
- Enable DNS over HTTPS and click “OK”

Low Hanging Fruit
This isn’t an end all be all mitigation to having your web history tracked.
- You still can be tracked by the IP addresses you visit.
- You can still be tracked by using encrypted DNS in some cases.
To have a complete privacy solution, it is recommended that you couple encrypting your DNS queries with using a virtual private network or through the TOR network to add another level of security. You also should always being accessing websites with HTTPS to keep your communications secure after you have received your encrypted DNS queries.
If you choose between adding an extra layer with VPN/TOR or not, using DNS encryption will keep you from being in the low handing fruit category for attackers to compromise through a DNS spoofing attacks. An attack that could redirect you back to a malicious service on the internet to further compromise your network. Encrypt.
michael rinderle
Michael has been a professional in the information technology field for over 20 years, specializing in software engineering and systems administration. He studied network security and holds a software engineering degree from Milwaukee Area Technical College with thousands of hours of self-taught learning as well. He mainly writes about technology, current events, and coding. Michael also is the founder of Sof Digital, an U.S. based software development Firm. His hobbies are archery, turntablism, disc golf and rally racing.
Comments are closed, but trackbacks and pingbacks are open.