What is an intrusion detection system?
An intrusion detection system (IDS) is a device or piece of software that sits on your network monitoring for suspicious and downright malicious activity. Without an IDS, there is a good chance that attacks could be mounted against your network without you even knowing it. Read further to learn how to install an enterprise IDS to your production network.
For this we will use Security Onion and VMWare’s ESXI server.
Why use Security Onion?
Not only is Security Onion a free and open source Linux distribution, it comes with a massive set of tools to monitor your network. It comes with Logstash, Kibana, Elasticsearch, Zeek, Wazuh, Suricata, Squert, NetworkMiner, and others. You can take advantage of the Snort VRT and Emerging Threats IDS rulesets so you can trust you have a collection of the most recent threat signatures known in the wild. It also comes with an easy wizard that makes setup a breeze.
Setting up the network
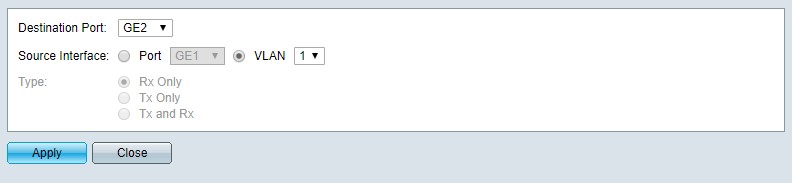
We first have to setup the network environment in order to monitor all traffic over the network. To do this, we need to setup a SPAN port on the switch our ESXI server is connected to. Log into your switch and setup up port mirroring. What this does is make a copy of all the traffic for each port on your switch and diverts it to this port that we will connecting to our Security Onion for monitoring. Keep in mind your server will need at least two network cards. One for network access and one for monitoring all traffic on the virtual local area network.
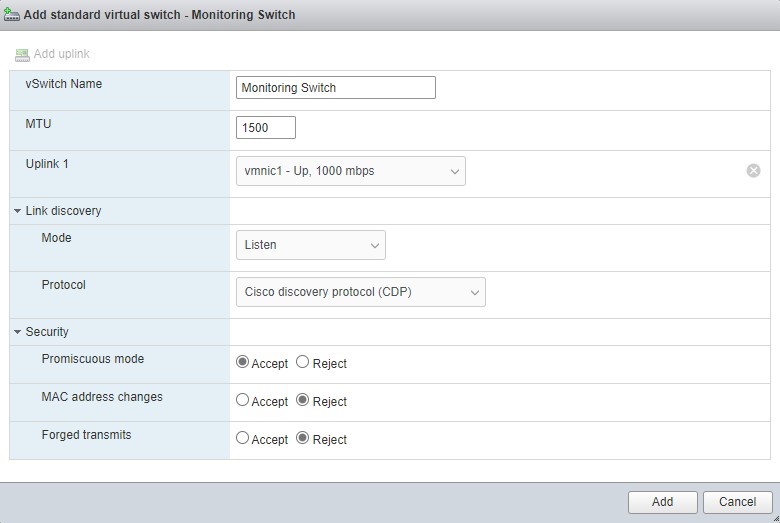
We now want to configure an additional virtual switch in our ESXI server for Security Onion to take advantage of the SPAN port we just configured on our switch. Log into your server and locate the networking pane from the Navigator. Click on the virtual switches tab and add a standard virtual switch.
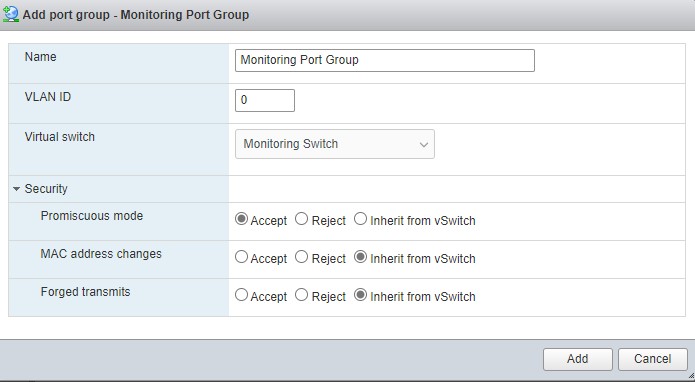
Now we need to setup a port group for our new switch. Go back to the networking page and select the port group tab. Select add port group.
Downloading and verifying Security Onion download
Now that everything is setup on the networking side, we need to download a copy of Security Onion. We can grab the Security Onion ISO file for installation from GitHub. We also need to make sure to verify the ISO image with gpg to confirm our download was not tampered with during transfer.
wget https://raw.githubusercontent.com/Security-Onion-Solutions/security-onion/master/KEYS
gpg --import KEYS
wget https://github.com/Security-Onion-Solutions/security-onion/raw/master/sigs/securityonion-16.04.6.6.iso.sig
wget https://download.securityonion.net/file/Security-Onion-16/securityonion-16.04.6.6.iso
gpg --verify securityonion-16.04.6.6.iso.sig securityonion-16.04.6.6.iso
Installing Security Onion on ESXI
Now that we have a verified copy of the ISO, we need to transfer it to the ESXI server’s datastore. Go to the storage pane from the navigator. Click on the database browser and upload our downloaded ISO.

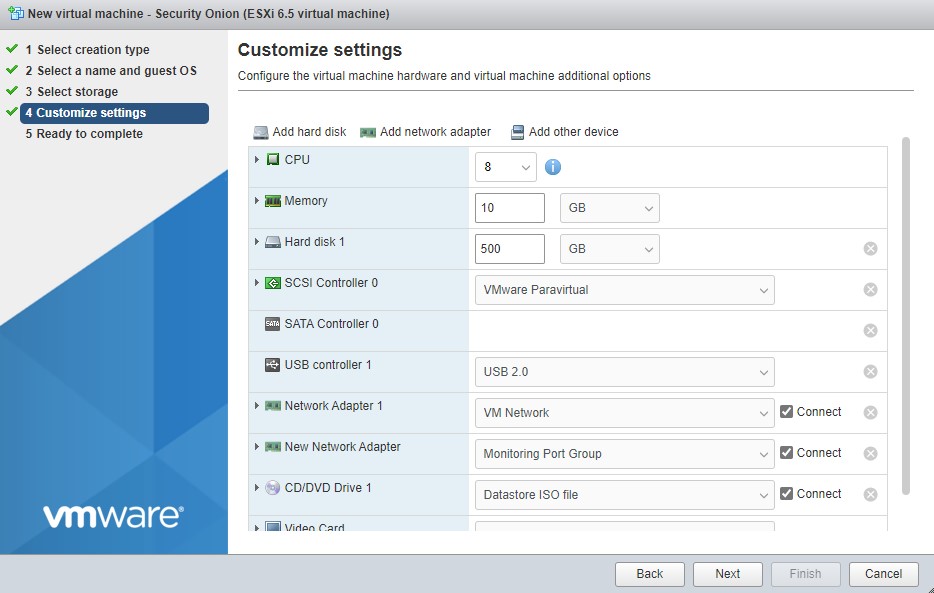
Now we can create the virtual machine. Click on the virtual machines pane from the navigator. Click on create / register vm. Follow the dialog; name the vm, set the OS family to “Linux”, and set the guest OS version to “Other 3.x or later Linux (64-bit). Select your storage, CPU, memory, hard drive, add your additional span group network adapter and select the uploaded ISO you just transferred to the datastore on CD drive 1.
Setting up Security Onion
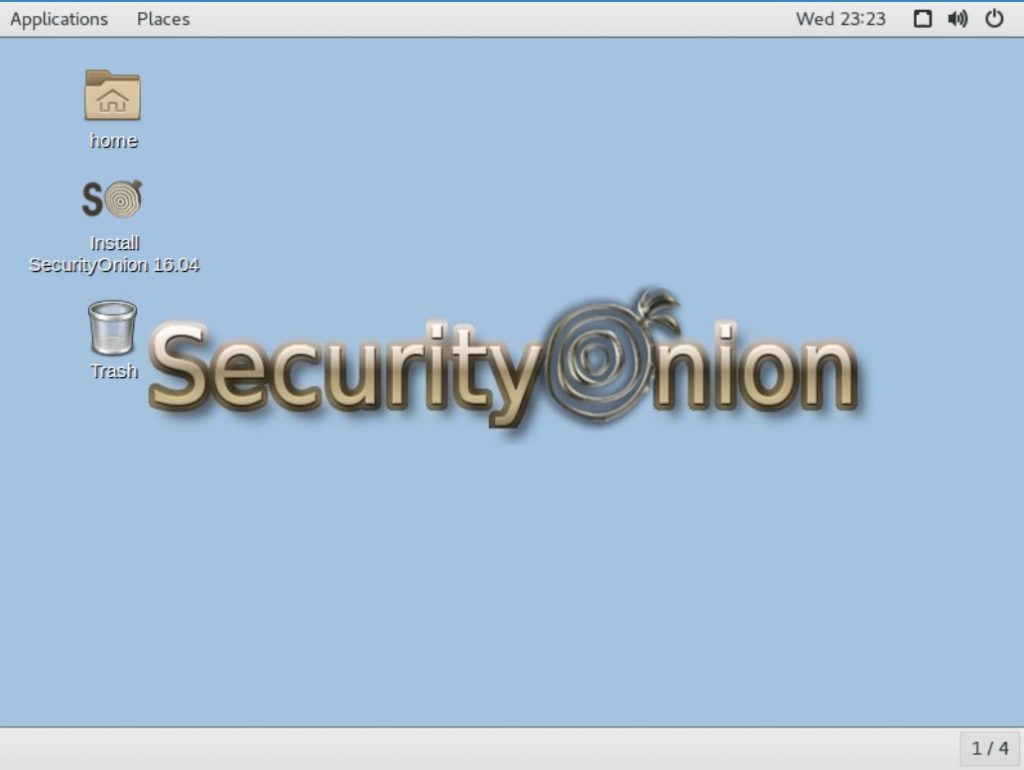
Power up your new virtual machine and open console in a new window. Once the virtual machine has booted up to the X-Server, double click on “Install SecurityOnion 16.04” to begin the installation process.
Tips for the install:
- Don’t download updates while installing.
- Don’t install third-party software for graphics, wifi, flash, mp3, or other media.
- Select “Erase disk and install SecurityOnion” option for best performance.
Once the install is done, reboot the system. Eject the ISO from your CD drive 1 of the virtual machine settings.
After restart, click on “Setup” to configure the rest of the settings.
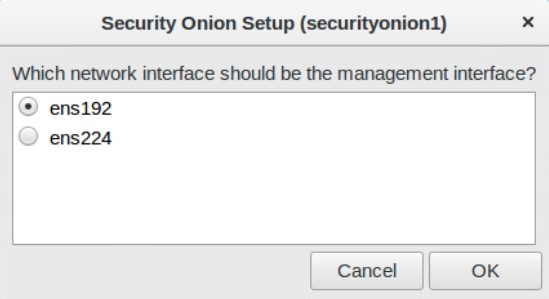
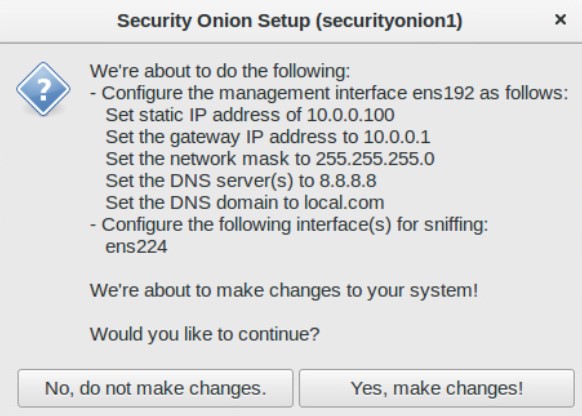
It is a good idea to set a static IP so set an unused IP address on your network, its mask, gateway, DNS, and domain name.
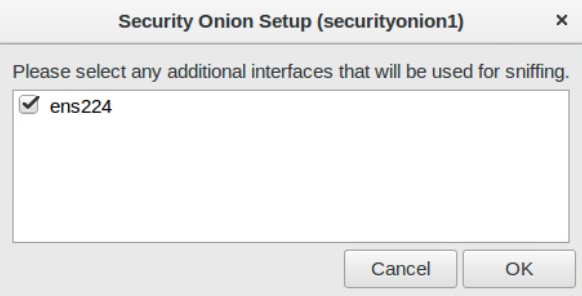
Next setup your sniffing interface. It should already be selected when you say yes to configuring the interface.
When done, it should have this dialog. Click “Yes, make changes”.
Then reboot. It’s now time for the second round of setup. Once rebooted, log in, click “Setup” and skip network configuration this time.
- Select production mode
- Follow the first user account setup
- Select “Best Practices”
- If you don’t have a subscription to Emerging Threats, or Snort, select Emerging Threats Open
- Depending on your ruleset, select Suricata if you don’t have a subscription.
- Enable network sensors services
- When configuring HOME_NET, make sure you select your private network address range only.
Once you have configured your settings, let Security Onion setup one last time.
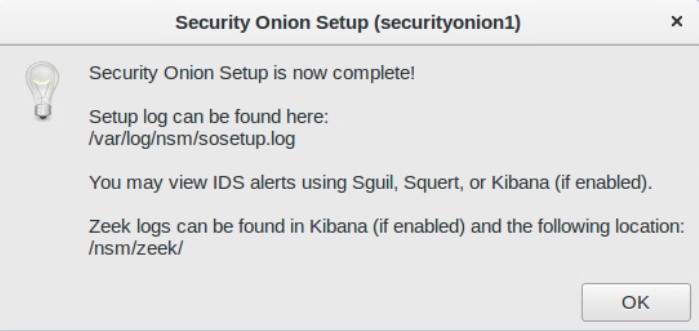
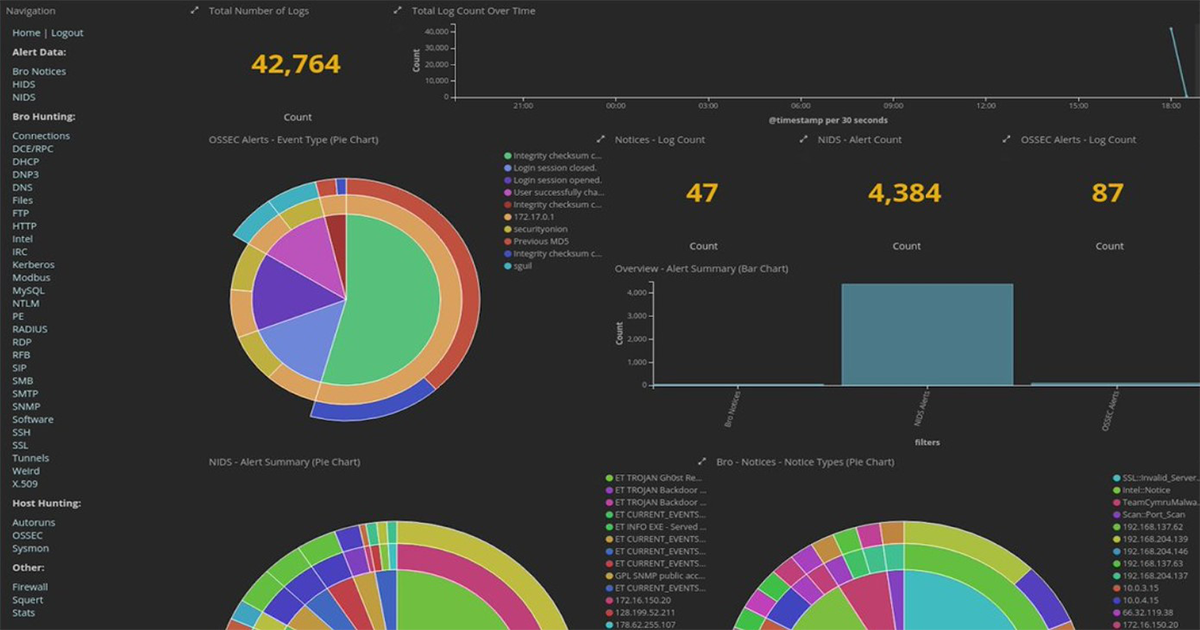
That’s it. You now have a fully fledged intrusion detection system on your network
One more thing is to test and make sure all the services are running correctly on your system. For this we use:
sudo so-status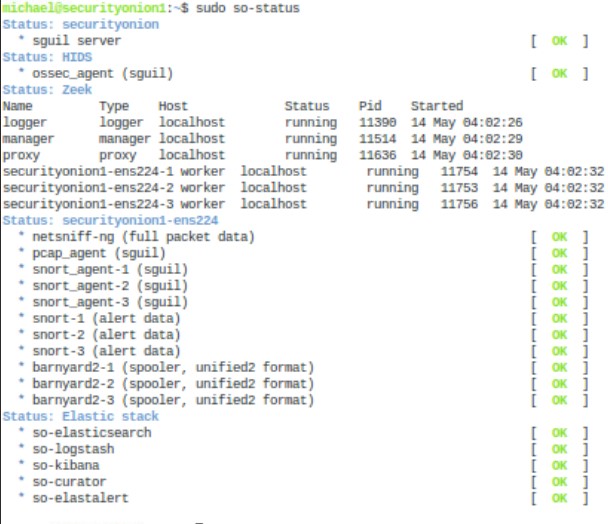
If everything is okay, you should get all green OKs in the terminal. If something isn’t working. Use the following command:
sudo so-startNow that you have everything installed, learn to use the tools. The following are links to the tools to get you started.
Logstash
Kibana
Elasticsearch
Zeek
Wazuh
Suricata
Squert
NetworkMinor
Snort
Happy hunting for potential threats on your network!
Comments are closed, but trackbacks and pingbacks are open.